
Most of us usually throw out old tires without knowing that we could really use them for many other purposes. Often we see wasted tires along the roads that are apparently useless but are recyclable. There are many ways we can utilize our old car tires such as decorating home or could even create a playing item for kids. This might look strange to you but after letting know about the DIY projects, you might change your mind and will try to make one for you. Following are 3 different DIY projects and all are amazing.
 This was one of the most amazing DIY projects I have seen so far and too much easy too. You will love to do it especially when your kids are insisting to bring some new swing for them. I saw this on accordingtoboyle blog, so I am letting you to read the method from where it was originally published. Here is the method.
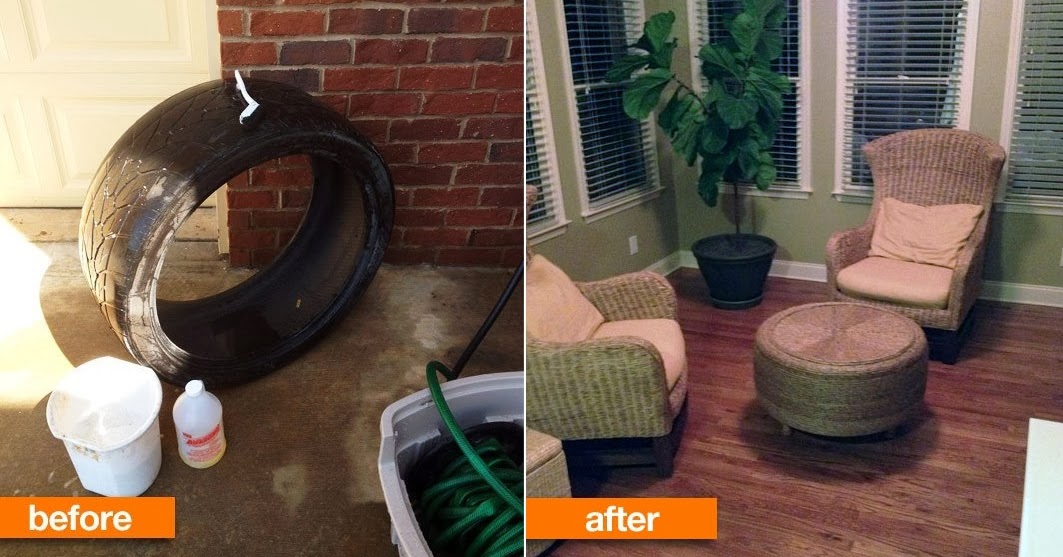 Are you in need of some small table or an Ottoman to keep alongside your sofa or chair ? Well, it is not that difficult to make it yourself in home as you can simply make one using your old tire which you might have planned to throw away somewhere into the waste room. So I suggest don't throw away your old car's tire but utilize it by making an awesomely looking Ottoman for guest room. I got this idea from apartmenttherapy blog so I am sharing with all of you. Here is the method.
 This wonderful idea is taken from archieli.com, all you need is to set up your mind and then this DIY project will let you make an awesome looking chair which you can use it in your home. This is one of the most amazing projects and you just need few items in order to make one for you. Following are the items require in this project:
Method:
1. Awesome Tire Swing for Kids
2. Make an Awesome Ottoman Using Old Tire
3. DIY Old Tire Chair
- Used Tires (two tires)
- Wood palettes (must be of enough size to fit on the back, See image for clarification)
- A drill machine
- Stapler
- Sponge to fill the chair
- Fabric
Method:
- Take one tire and drill holes inside it.
- Attach the sponge to the tire with the use of the stapler (You definitely need to make your chair a more comfortable so in order to do this, you need to cover the inside of your tire with the sponge you already have arranged)
- Next step is to cut out surplus of sponge on the edges and staple a piece of fabric to the bottom of one tire. This part will be placed on the floor when chair will be finalized.
- Now next step is to take the drill and make holes into the wooden palettes, screw the wooden palettes to the tire as shown in the image. You can choose the size of the back according to your own wish. Decide the size of the back and cut wooden palettes accordingly.
- Now get the second tire and attach it with the other one and wooden palettes as you have done with first tire.
- Fill up the second tire with sponge to make it comfortable.
- Now the structure is ready which you can cover up with the fabric you already bought or sewed yourself.
Share this article with your friends.


0 comments:
Post a Comment